SHC Search

Thursday, July 16, 2015

1967 Jaguar XKE

Anyone who knows me, knows how passionate I am about old cars... and how I got that way. Some of my earliest memories were of my grandparents and their 1967 Jaguar XKE that they road raced and participated in the Pennsylvania Hillclimb Association in the late 1960's and early 1970's. One of my favorite stories told by my grandfather was about the unfortunate time that my grandmother rolled the Jag over in a road race and slid down the passenger's side. He admitted to letting a bit too much air out of the tires that day, and while taking a turn the car rolled over. I have an old black and white photo of the damaged roof, but I don't remember the incident personally.


Fast forward about 45 years or so, and we come to this weekend. My parents are cleaning out their home in NJ as they move on to retire in PA, and while going through some old boxes in the garage that belonged to my grandfather we find an odd piece. A chrome car door handle with the Wilmot Breedon (aka Union key) stamped "Made in England" still in the handle, and lot of road rash down the crest. I immediately grab my phone and Google image search what a 1967 Jaguar XKE door handle looks like, and sure enough here was the piece in my hand. Unbelievable, actual parts from the infamous wreck. To some people, they would think this is just a piece of junk, but to me it is a treasure I plan on keeping.

Friday, June 26, 2015

3100 Truck Bed


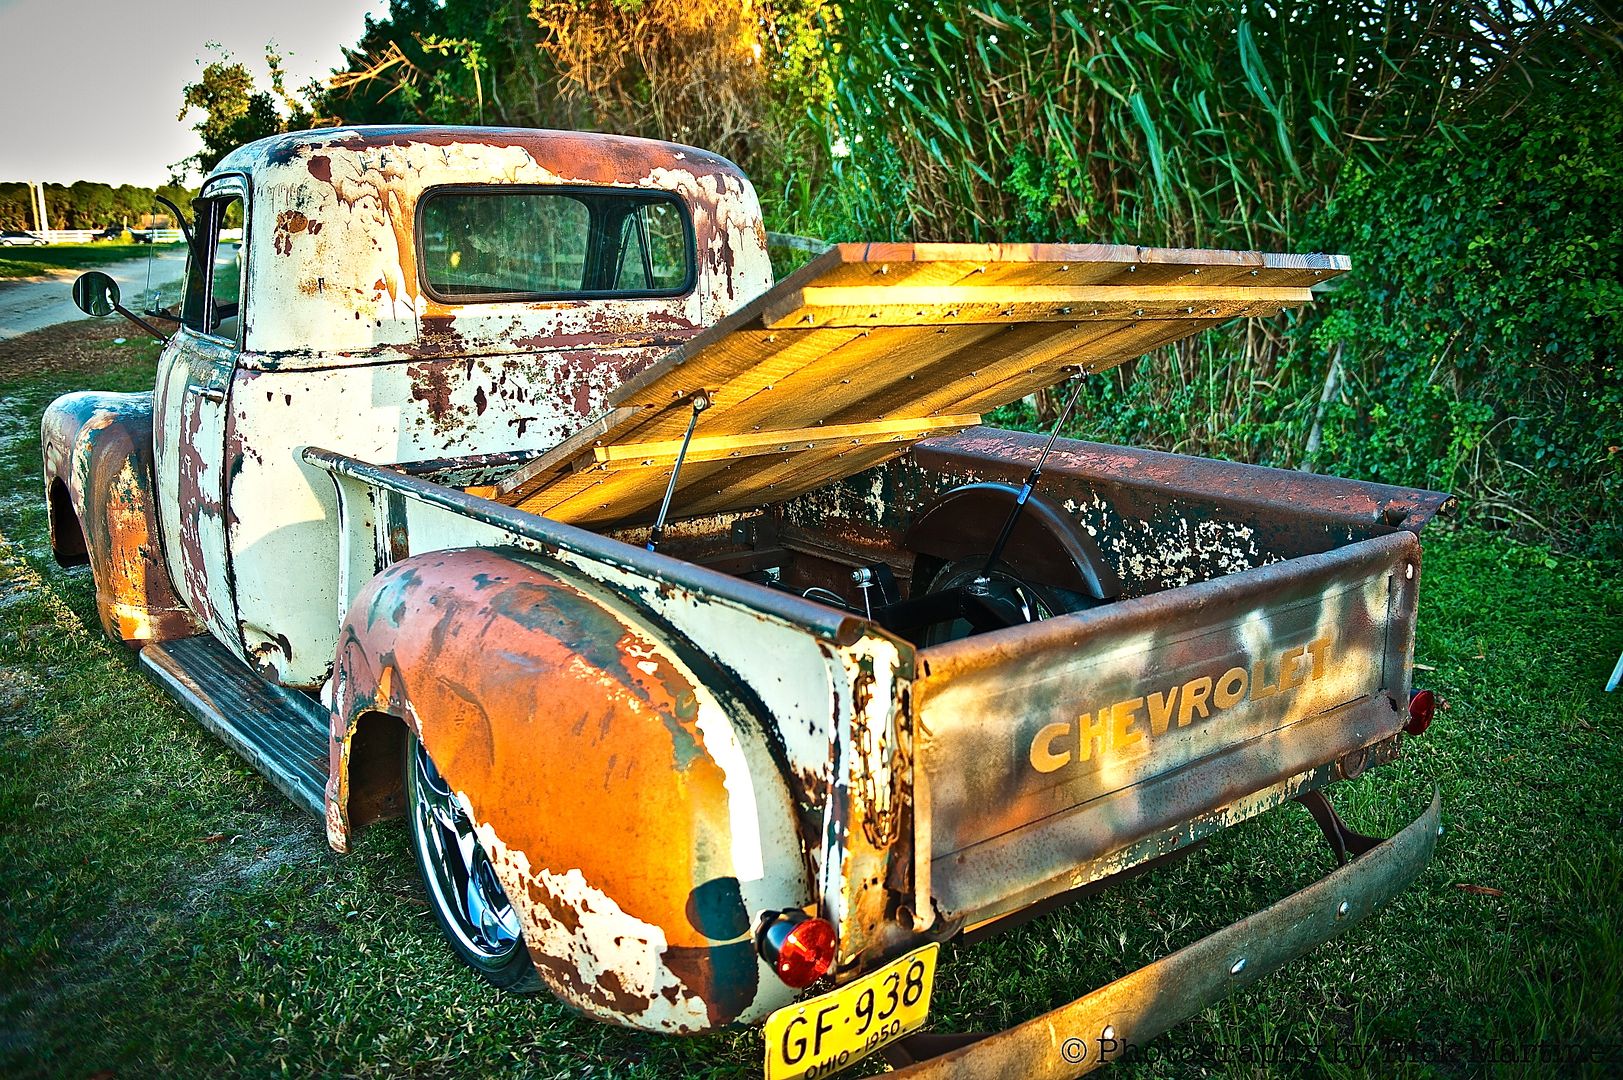
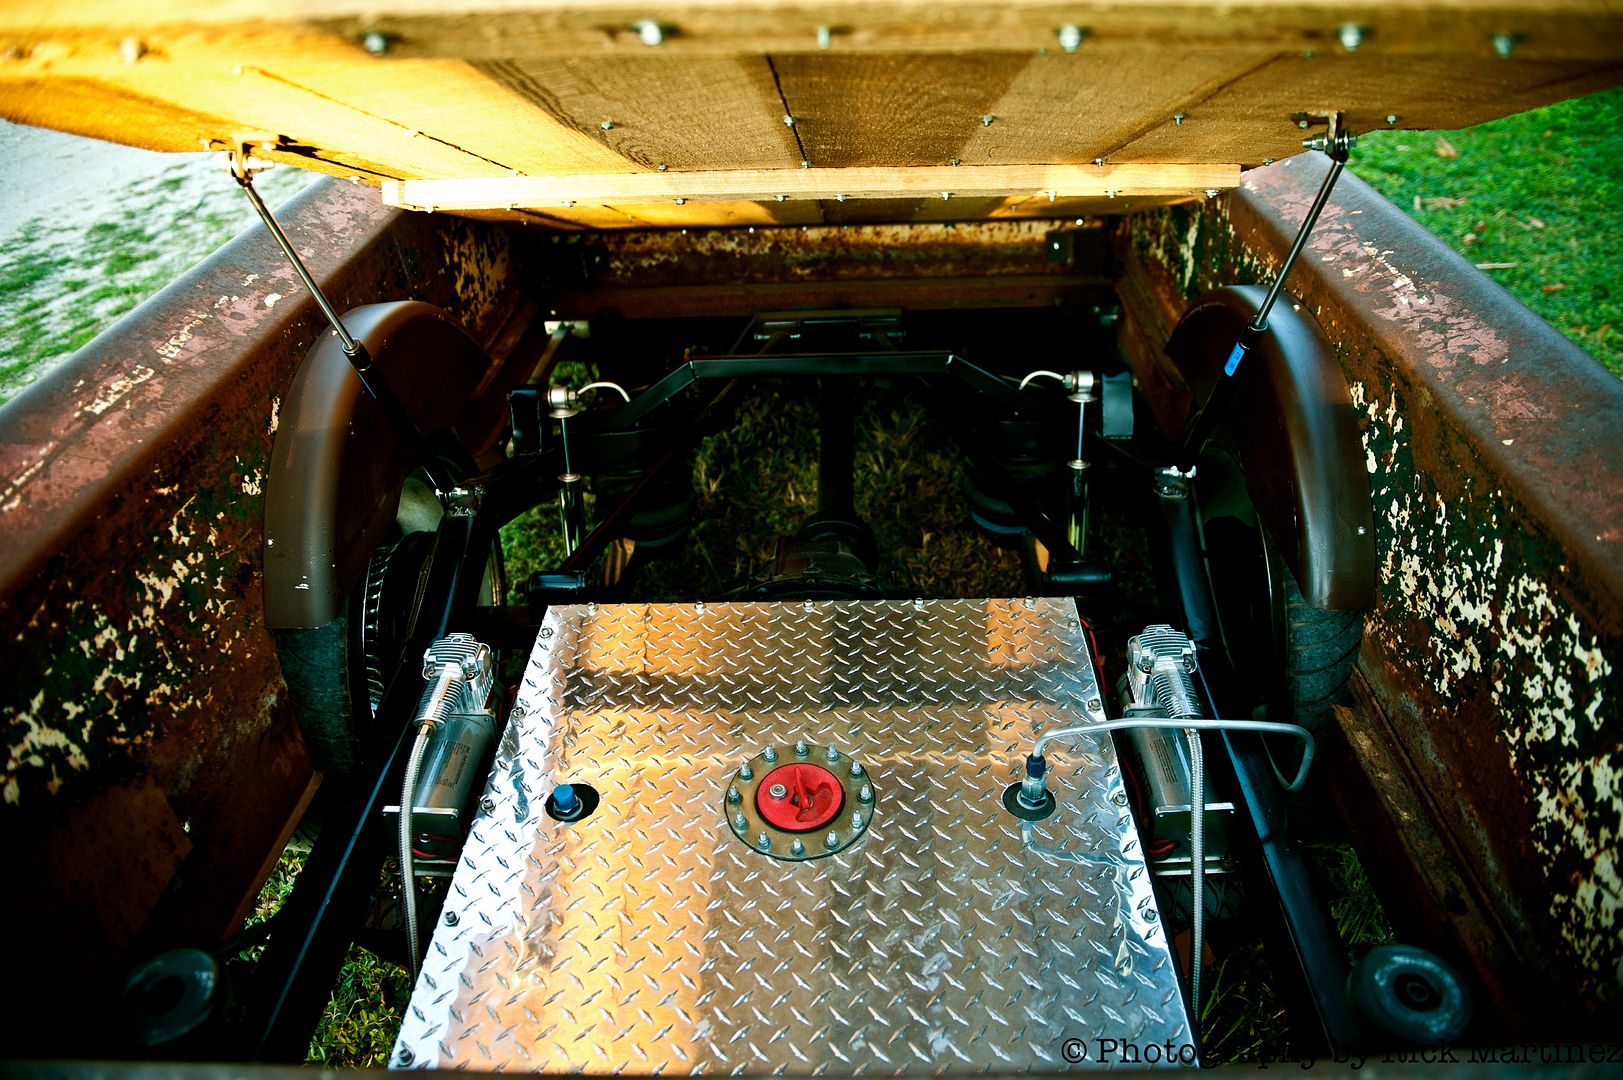
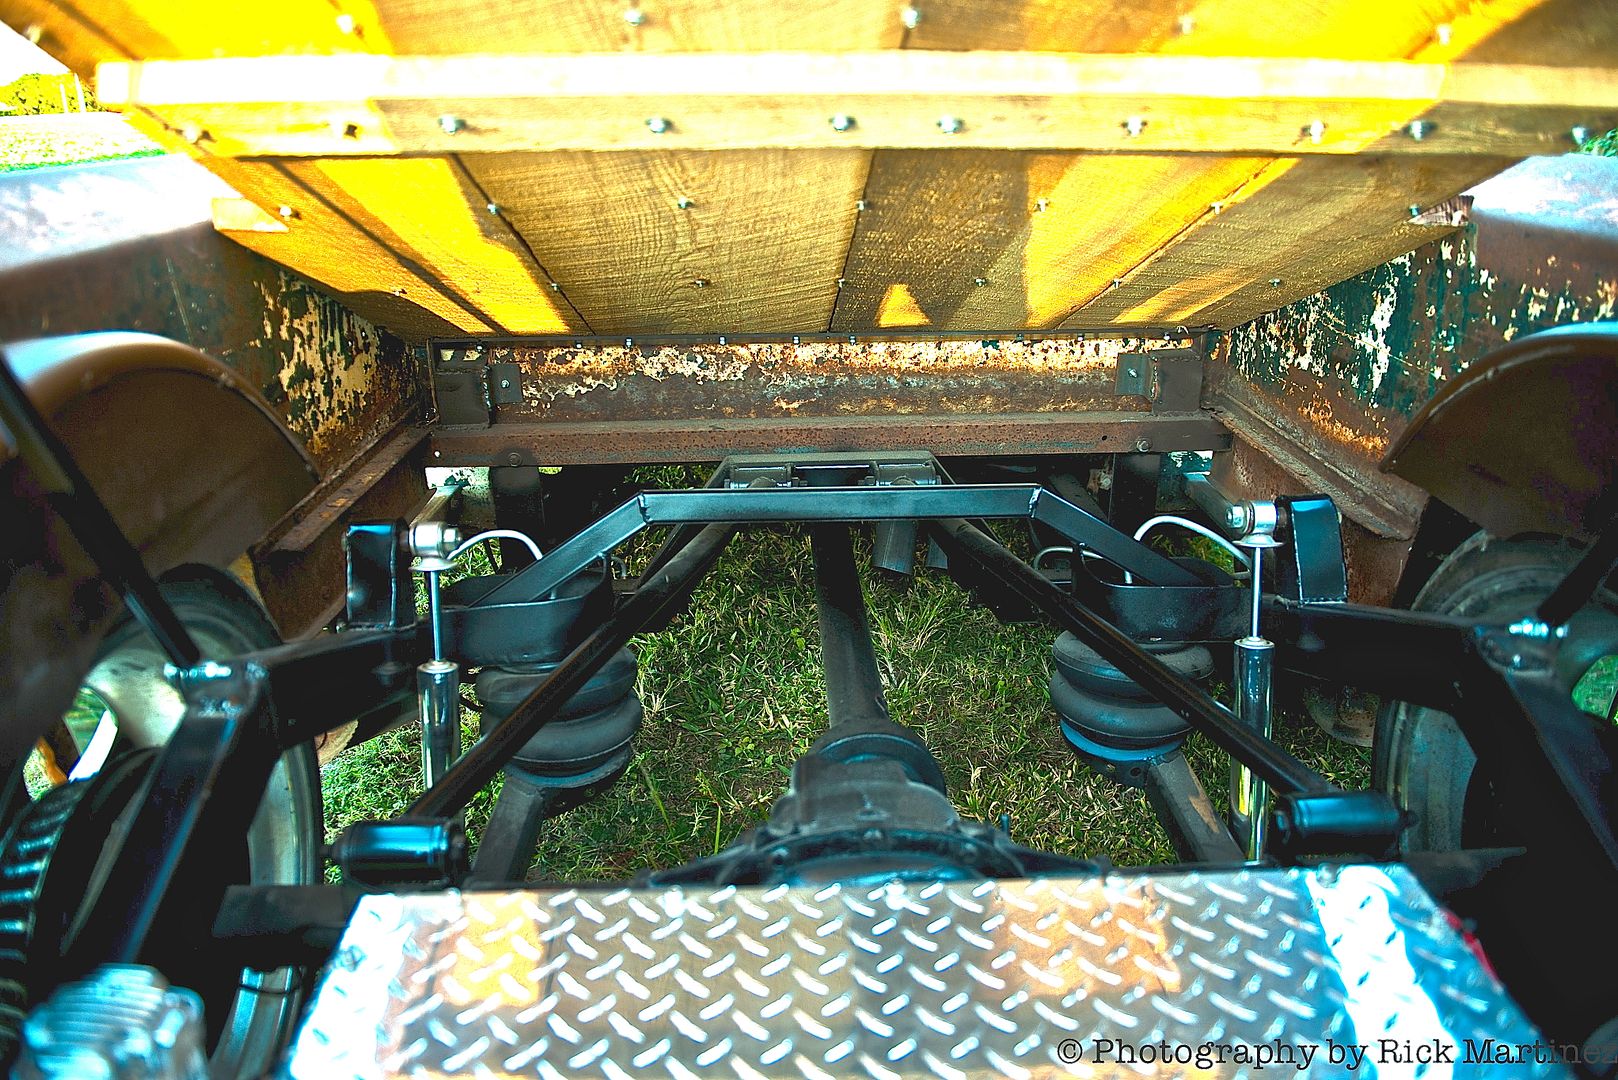
While on vacation this week, I finally got around to the new oak truck bed for the 3100. The kit I ordered from Mar-K was for a 1954, which was just a little closer to the length I was looking for. I first sanded all the wood down with 120 and again with 220 grit, and rounded the edges over slightly with a file to help the next step. I then cleared everything with a few coats of Nason automotive clear on all sides.

The installation took all day, due to the fact that this truck bed is hinged at the cab side to allow access to the suspension and fuel tank. I added a few steel straps to tie everything together with the polished stainless hardware, and it all came together rather nicely. I am now just waiting for my linear actuators to assist with the bed lifting.

Sunday, June 21, 2015

Truck Cab

There have been a few things about the build of the '52 3100 Pickup that have gotten me aggravated, but none more than the previous owner's inability to use the correct fasteners. A few weeks ago, we took the bed off the frame again, and replaced the tiny little bolts with some standard-sized grade 8 nuts and bolts. I even used these fancy "lock-washers" that prevent the bolts from loosening up and falling out. According to Google, the lock washer was invented by a blacksmith in New Brunswick named Morris Landry in 1901 to keep the nuts on rail cars.... so WTF, why couldn't you put them on my truck??? I knew there was an issue because not long after I started driving the truck did the cab and bed start making contact and messing up the paint on the cab corners. Awesome.

So the next step was to check the ever-loosening cab mount bolts, and as you can guess some were not up to par. I removed the seat and seat floor platform, cleaned up the mess underneath (including the carcass of a petrified rat) and got to work replacing the hardware. The bottom of the rubber body mounts on the cab were a flimsy rubber O-ring, so I added a solid rubber Camaro body mount to the inner section of it, and of course the required lock washers. Before reinstalling everything, I wanted to put some sound insulation on the floor, so I called my local car audio installers... they wanted $120 for a 10 foot piece of "Hush Mat". After a bit of research, I came to find out that Lowe's has a "Peel and Seal" product that works just as well for about $18. It was a quick and easy fix that keeps the road noise down, and seals the factory holes in the floor as well. It is much quieter now, and although the cab feels better on the frame, the gap is still pretty close between the cab and truck bed. I'll have to tweak the filler panels when I eventually do a bit of body work, but for now the ride is much better.


'67 Camaro RS Headlights


When I first picked up the Camaro, the RS headlight system needed some work in order to make the doors work correctly. After much research, I finally figured the system out. There are three relays tucked up in the driver's side fender, along with a few switches and a pesky little rectifier diode up under the dash. The relays were incorrectly wired, so that was an easy fix, and I did need to replace one of the headlight door motors. Finally the rectifier diode went, because the doors would open normally but not close at all. I couldn't see any reason I should have to replace that entire harness under the dash at a cost of over $50 for one small faulty part that cost less than $1. 
It turns out that the RadioShack-276-1661 part is a perfect replacement, so I just had to run down to my local... oh wait, they closed Radio Shack stores. I quickly jumped on eBay and grabbed a 4 pack. I swapped the rectifier, covered it in the correct cloth tape, and now the headlights on the '67 Camaro RS are once again working perfectly.

Saturday, May 02, 2015

3100 Truck Gas Tank

The gas tank on my 1952 Chevy 3100 Pickup had a hole in it. I tried to patch it up with Caswell sealer from the outside, but that only lasted a few months because I just dabbed a bit on the outside of the tank. After a bit of research, I realized that the gas tank was from a 1965 Ford Mustang, and so I picked up a new one at Carlisle at the Spring Swap Meet along with a new sending unit. I cut the float and sending unit off, but kept the pickup tube and sock filter. I cut a 1 5/8 hole in the top of the tank to mount my sending unit, and now it looks and works great. I then took the cheap plywood bed floor off and mounted the empty bed back on the frame using the right sized bolts. If you take a close look at the above pic, you will see the bed mount on the right rear is significantly lower than the left side mount, so the bed had a lean to it. I shimmed it up for now, but I might cut it off and re-weld it higher next time.

The next project is to make a nice new wood bed that might lift like this one...

Saturday, April 04, 2015

Wiring Circuits

I haven't been driving the 3100 Pickup much this winter, as I really didn't want to drive it in the snow or salt covered roads. So, after the winter thawed, I installed a new Optima battery and a 100 amp alternator to make the electric system all new.

I started the pickup up to take it to work the other day, and was surprised to find out that I never finished some of the wiring projects on the truck. I had to share a circuit for the electric fan (just the relay on) and electric choke, and when I manually shut the fan off to allow the truck to warm up faster in the cold weather, I also shut off the choke. That's not going to work... I learned that the hard way.

I purchased an additional three fuse circuit from Painless Wiring that was a perfect fit. I wired the choke and the fan to their own keyed, dedicated circuit, and a new constant hot lead for the lighter so that now I can charge my phone or plug something in the lighter. For you kids, that's what you called the power outlet in a car prior to the 90's.

Saturday, March 14, 2015

Atlantic City Car Auction Follow-Up


Zach and I could not remember why we didn't make it to the AC car auction last year, and after this year... well this may be the last one. It's not the nearly 2 hour drive to get there, nor the tolls or parking fees (they certainly don't help though), and the lunch at the Whitehouse sub shop was as good as always.

When we got to the AC convention center, I noticed that none of the ticket sales booths had any prices on the windows, nor any signs with the admission cost. Only after I went up to pay was I told that it was $25 each to get in! Really? That is too much to just get in and walk around to look at a few cars. It would have been different if you were paying to get registered for a bidder's pass or registering to sell a vehicle... but $50 for two guys to check out a few cars is too much.

I figured at the very least I could take a few pics, so here they are...


Sunday, January 25, 2015

Atlantic City Car Auction

As I sit here and dread the impending snow storm that approaches, I try to convince myself that the warm weather will be here soon and I will be back outside playing with cars soon. The Atlantic City Car Auction every year feels like the last part of winter for me, so I go to not only enjoy the cars and swap meet, but also to say goodbye to the cold winter months. The event is held February 27-March 1, 2015. We also make sure to visit the White House Sub Shop and enjoy some awesome subs... can't wait.

Saturday, January 17, 2015

Barrett-Jackson 2015

The entire family has been watching the outstanding coverage of the 2015 Barrett-Jackson Scottsdale, AZ collector car auction on Velocity and Discovery. It has been way better than the horrible coverage the Fox attempted previously.

We can't wait to see the rest, including the Ron Pratte collection. I've seen him purchase many of these cars over the years, and now he gets to sell them again. Zach and I went out to the garage to start the Camaro and take the '52 Pickup out for a full tank of gas. We just got back, and the show is on.... got to go!

Sunday, December 14, 2014

Upcycling

I found this cool lamp on Pinterest, and finally discovered the term 'upcycling". Basically, you take your old car parts and turn them into something else, like decor or furniture. I've held on to some old crankshafts, cams, connecting rods etc just for such a purpose, and can't wait to get started.

Friday, November 07, 2014

New Steering Wheel

Sometimes I seriously wonder how stupid people are. The previous owner of my 1952 3100 pickup had installed a cheap, billet wheel that was only held on by five tiny horn cap screws....yeah, that's what was holding the steering wheel on to the truck! 

It also did not fit the column, and there was this hideous gap from the side. I looked at a few replacements at the swap meet, but they were expensive, and not very stylish. The stock steering wheel for these trucks was as bland as they could make it.

So, I went on to eBay and picked up a used 1955 Chevy Bel Air steering wheel. It is not perfect, but the design does fit the truck pretty well. It was so easy to install, and the ugly gap from the side view is completely gone. The wheel is also held on by the large steering nut attached to the steering shaft... like it was designed to.

In the future, I plan on restoring the wheel with new paint, a new chrome horn ring, and either filling the two small holes for the horn cap emblem or buying a new emblem.

Now thanks to the larger 18" diameter wheel, it feels like the truck has power steering... and I'm not worried that the steering wheel will come off in my hands while I'm driving it.


Wednesday, November 05, 2014

Other repairs...

There were a bunch of other things that needed some repair on the truck. The radiator was not original, nor did it fit the truck at all. The top inlet had to be relocated, because the radiator hose was so twisted it was hardly flowing. I took it to the radiator repair shop, and eventually they got it right. I custom made my own overflow tank from a bottle of Jack Daniels, and that will do for now.

I had plenty of issues trying to tune up the pickup, so a new points conversion kit was in order. While I was at it, I also replaced the Rochester Monojet with a new rebuilt carb, and constructed a non-existent crankcase ventilation system. There was no PCV, and the engine like to diesel a bit when shut down. Now that I installed that and re-timed it correctly.

There were  few things that needed attention: no gas gauge sending unit, wiper motor jammed up and left on (motor was practically bunt out), no door locks, no door handles, no bolts holding in the hood vent. These were all easily fixed, and gave me time to get acquainted with the truck.

I did find that the billet aluminum steering column drop was a bit too low for me, so I fabricated up a new one that kept the column closer to the dash and provided more leg room. Now I am just waiting for my new (used) 1955 BelAir wheel to arrive, and to see if I can mount that up to replace the current wheel that is too small, AND only held to the steering shaft with 5 small allen bolts on the wheel center cap. I am not digging that at all.

Tuesday, November 04, 2014

3100 Truck Heater

Take a look at this nice smooth firewall, wouldn't it be a shame to cut a hole in it? Well, I had to cut two , because there was no heater in this truck...so I made two holes for the 5/8" heater hoses and the new Mojave heater system. The unit is basically a small heater core with an electric fan built in, and there is a secondary plenum with three vents. 
Two are directional, and the third is used to hook up the duct work for the defroster. I installed two new defroster ducts and hoses prior to going any further. 
I was able to pull back the carpet and expose the original firewall. Luckily I could weld on four bolts to the firewall without it effecting the nice painted side in the engine compartment.
 Then I simply mounted the heater, cut two holes for the 5/8" heater hoses and grommets, wired it up and installed the switch in the existing hole in the dash. Now the truck has HEAT!

Sunday, November 02, 2014

Air Ride Pickup

The first day the truck was home from Texas, and I already ripped the bed off of the back to figure out how the air ride was wired and set up. The entire wiring system for the air compressor was done incorrectly, so I spent a day or two re-doing that. Once that was done, I moved on to the brakes, or lack thereof. As you can see from the pic, the rear brakes were not even working at all. I was able to figure out (through a few trips and return trips to the auto parts store) that the chassis was a 1990 S-10, which is important because the brakes change after 1991. Then while I was rotating the axle, I heard a sound like a grinding Gatling gun from the rear end. Oh great! After pulling the rear cover off, I discovered the spider gears were very loose, but they were not actually the issue. The carrier was worn, giving the spider gears too much play. So I called up Randy's Ring and Pinion for some much needed replacement parts. At some point in the process of playing with the bed body, brakes and rear end, I discovered that the entire rear end was installed about 7/8 of an inch too far to the left. I went over to ACE to put it on the lift and fix that. Chris, Zach and I cut out the rear, and re-welded everything in the correct place. On to the next issue....

1952 3100 Pickup

Well, here is my new truck. A 1952 Chevrolet 3100 Pickup. She sits on a 1990 Chevy S-10 chassis, with air-ride suspension, disc brakes, and a newer 250 inline six motor coupled to a turbo 350 automatic transmission. I spent such a long time trying to find a truck like this, but everything on the east coast is a rust bucket. This truck was a California truck, and bought from Texas. I researched the previous owners name, and came up with a pic or two of it in the process of its restoration. By the time I first saw it, she looked like the photo and video below.


My 1971 Chevelle

So, I traded the 1971 Chevelle for the pickup, and it was now hanging out in Texas. The car needed nothing mechanical, but I was getting worried about the condition of the body from being outside all these years. I had spent a lot of time making it nice, and I really didn't want to go through all that body work and paint again if I didn't have space in the garage to keep it looking nice. That was the main reason to go for the trade. I had traded the Buell for the Chevelle, and I really didn't have much money tied up in it. I certainly made a few bucks on the trade in value.

The new owners of the Chevelle decided to repaint her, and lay down the famous Chevelle stripes that Zach always wanted. It eventually sold for $17,999, or so it said on their web site at Classic Car Liquidators. They made it an SS clone by adding the badges on the front grille and read bumper, but it didn't look like they touched the interior or powertrain. All I know is that the new owner will surely enjoy that car, she ran great!

They even posted a video on YouTube!

Long Time Gone

It has been a long time since I've posted anything here. I have spent my online time looking at Facebook and Instagram, but honestly I am not sure why anyone else would read my post here. I do this for myself. I have been busy living, working and enjoying my family. We even got a new dog.

So in the past few months, I have traded the 1971 Chevelle in for a 1952 Chevrolet 3100 Pickup. I found the truck online in Texas, and we made a deal to trade.
I
I shipped the Chevelle down to Texas, and two weeks later received my pickup. There were a few things that I needed to do first, but I don't mind. I actually enjoy that part the most.
 
Unfortunately, there were a few things that were not disclosed about the truck, like the faulty wiring, lack of door locks (or ability to even close the doors completely) the poor brakes, no shocks and trashed rear end. I'll save all of that for future post.

Sunday, January 26, 2014

Rebel Corvette

The 1969 L88 “Rebel” race car just sold for $2.86 million at the 2014 Barrett Jackson auction in Scottsdale, AZ. I have a video series featuring Kevin Mackay of Corvette Repair, where he discusses finding the car in a junk yard and its restoration. Check it in part 4 of the series here, and also in part 5.