I did it! The Stingray now has a shiny coat of paint, and I did it in my garage for a few hundred dollars. I started by giving it the basecoat of 1967 Marina Blue, and as can be expected, had immediate problems. The lower doors and hood were terrible, with lots of sand scratches that were were visible. I took the hood off and sanded it down with 600, and then re-shot it again with the base. The doors were also wet sanded down to the primer and re-shot, each with three more coats of base blue. No big deal right....wrong...I spilled about $100 worth of paint when I dropped the gun. Nice job. So I was running out of supplies quickly. What, no picz you say? I was so frazzled, I forgot...sorry. Then I had to lay down the thin line tape for the hood graphic, and by then I was ready for bed.
 Wake up the next morning, paper off the entire car and shoot some black down the hood. After removing the paper/tape I found a few areas that needed a bit of a touch up, so I adjusted the spray gun fan to small, reduced the air pressure, and was able to blow in the paint like an air brush. I was pretty excited with my new talent!


 So here it is as of tonight, with two medium wet coats of clear, and a ton of dust, runs and bugs to color sand out of it tomorrow.
Yesterday, Tommy (72 Chevelle) and I were talking about how the body work was going. I told him that I probably know enough about paint and body work to write my own book...but it is the application of this knowledge that eludes me. Every time I do it , I get better at it, but there are those times where I swear I just got lucky at it.
My wonderful new neighbors are so kind and supportive as I push the Vette out into the driveway each day and sand, sand, sand. Then I push it back in and prime, push it out and sand. I tried to warn them that when the Vette is done, I am sure to have another project in the driveway, and they don't seem to be bothered by that. (Whew) I was wet sanding the car for what I thought was the last time with the 600, when I found this HUGE bulge on the rear deck. (I thought I had fixed it earlier) Damn, now I had to rough it up and start filling and feathering again. I lucked out by getting it the first time!So, you want to see what it looks like after all this sanding? I have given it my best effort with the sandpaper, washed it down, and plan to paint this week. Wish me luck!

 I didn't want to post another entry, but I couldn't let the opportunity go by with such a title. I hung the doors and hood, and tried to set all the gaps equally the same. Of course I'm frustrated with the results, because on a Stingray you can't shim the fenders or hood...just align the doors the best you can. I really want the body line to match up nicely, but it never really did before because the front end, and the rear end, are both aftermarket pieces.

The hood always had a huge lift here. Not much I can do about it, I can't bend fiberglass.
Then I found the little bag with the bolts, and of course I never cleaned them. So after I do, I'll hang the rear pieces and finish aligning the body parts to the best of my ability. Then finish sanding, and I hope (gulp) paint!
No, I'm not in the garage with the guitar...I'm jammin the doors and hood. I finally thought that I've spent enough time with the sandpaper, and it was time to put some color down. I hope to have the doors hung and the hood back on this week, so that I can sand the rest of the body with 600 and shoot it next Friday.
All I have to do today if figure out if I need to clear the jambs first, or hang the parts back on the car, paint the basecoat and then clear everything. I'll figure it out.


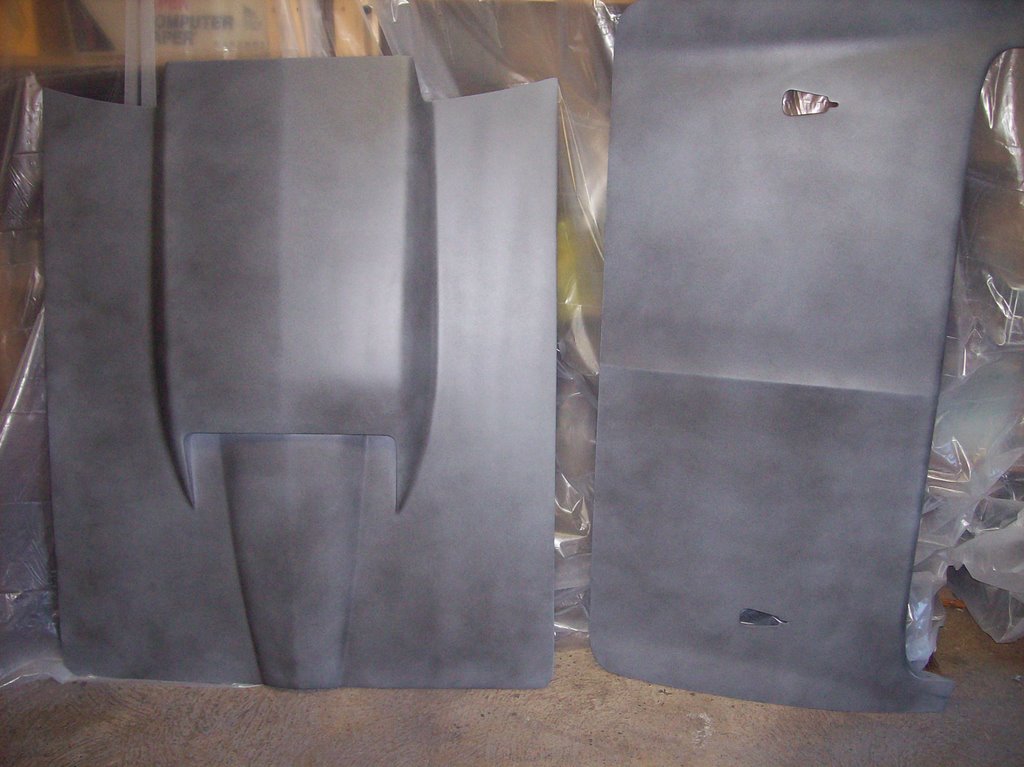
I sanded the hood...again...and then wet sanded it down to 600. I leaned the broom handle up against the edge to get an idea, and shot these two pics. I'm out of primer, but I think one more coat (or two or three) ought-a do it. Let me know what you think.
 It was a productive weekend here at South Hill Customs, and we had lots of welcome visitors. It started off with a visit from our good pal Tommy and his '75 Stingray.
Then we got a visit from Eddie, who has my first stingray, a '73 L-48. Unfortunately his ex-wife took a claw hammer to it in the garage and it needs some extensive body work and new paint....ouch!


 We also had a visit from a friend (who's identity will remain a secret for his own protection) with his new yellow 505 hp Viper. He just got it out of the repair shop with $20,000 worth of "minor" body and suspension repairs after he hit the gas a bit too hard and threw the rear end out into an oncoming mini-van. The rims alone are over $3,200 each!
I'm not sure who owns the red Lamborghini kit car, but he drove by a few times. Stop in if you get the chance!
Jimmy was here lending a helping hand, as well as Tommy ('72 Chevelle) and Dave "the Mayor" ('50 Merc) who stopped by to check things out. I titled this blog "No Fingerprints" not because we didn't leave any on the body work, but because I no longer have any fingerprints left, seriously!. I sanded so much that I have no fingerprints, just bloody tips on the ends of my hands. I am STILL working on the hood, almost there, just a few tiny waves to block out.
 My garage is covered in plastic, the floor, the walls, the ceiling. my tool box and my parts. So, when Nancy asked me what I was planning to do with the hardtop now that it was finished....I could only think to cover it with more plastic. We wrapped it up, and taped it, but later on I unwrapped it so that the paint could breathe (I really just wanted to feel the smooth glossy finish again, and show it off to any one who might stop by the garage!)
 How did I get that smooth shiny finish? Well, it started with some wet color sanding with 1000 grit paper, then on to 1500 grit paper (hmmm...I think I skipped the 1000 grit actually). Then I buffed with the Diamond Cut 2.0 compound, followed by the Finiesse-It. The final step is to buff once again with the Glaze, of course changing pads with each application. I didn't sand the rear valance, I will if I need to later on after the entire car is painted.
The best invention in the garage this week is my home made spray gun holder. I found this store-brand garage organizer (probably designed to hold an ironing board) hanging around the house, and bent it into the perfect shape to hold the spray gun so that I could fill it and set it down between coats of paint. 
 Why would anyone bother to restore a part that no one would ever see??? I spent hours taking apart my heater box to fix some cracks, and while I was at it, I figured I would sandblast the heater blower and give it a light coat of cast blast paint. WHY? I guess to have the satisfaction of knowing that it was cleaned and restored and .....man, I have issues......who cares!!!
I spent a few hours sandblasting rally wheels, headers, small parts, and my eyes. Then painted these parts, which are now ready for installation.
Next step is to lay down a little fiberglass on the heater box to fix those cracks....because the parts are way to expensive to purchase, new or used. The outer cover is about $168 and the inner heater box is over $450! A little time spent here on restoring these parts is money saved for other parts.
I am off of work the entire week, and it is cold and raining. It figures.
 I received my new valve covers purchased on eBay, and I think they look HOT! They have a billet aluminum rail, and a nice fabricated, tig-welded race look. Most importantly, they clear the valvetrain. I now need some good valve cover gaskets to keep any leaks from spillin' all over the new motor.
The correct oil pump pickup has finally been installed, I just need to put the oil pan on. I also got around to returning the parts that needed to go back to Jeg's and Keisler.
I'm off all week, let's see how much I get done!
I started making some progress this week...by taking the heads over to ACE and rebuilding them with Mr. Chris. We disassembled them completely, installed new Manley valves and teflon seals, and installed everything nice and neat. Then, after we got home, we both decided that the 2.055 intake valves were too big, and we should re-install the 2.02 valves...glad I cleaned them up and kept them! So, it looks like I'll be swapping those suckers this week, but by now I'm a pro, and it should only take about 30 minutes or so.
 We also took the new motor out of the crate and put it on a stand, and after I fix the valves, I will install the cam and check the piston to valve clearance.
Finally, I was showing Mr. Chris the new 5 speed, and he says,"You got a hydraulic clutch?"...to which I reply, "No". But I look in the box and there is one installed to the front of the trans...$H#!@.....I got a call to make tomorrow.

 Zach gave me my inspiration today. He said, "Dad, you don't have to do it all in one day. Just do a little bit every day, and it will get done." So I took this pearl of wisdom, and the new 5-speed and headed out to the garage. I srtripped the old block down, removing the heads, balancer, timing cover and oil pan. I threw the old iron heads back on so that I could sell the long block. The pistons have "STD" on the top, so that leads me to believe that the block has not been bored out...and it is a good "010", high-nickel block with 2 bolt mains.
 I am keeping my Performer RPM aluminum heads and vintage Torker intake....I know everyone says to go with a new intake, but I love that old gem.
New parts on the way, and I'm gettin' busy!
I ordered the 5 speed transmission/clutch and am waiting for delivery...and have decided not to stroke the motor. I worked on the new dash cluster the other day, and cut the hole for the new ignition start button. Now I need to strip all the paint off it, repaint it, and get ready to reassemble all the gauges into it. I've got a pile of parts to be sandblasted, waiting for a warm day for that. I am up to my @$$# in catalogs and magazines, getting my parts list ready for the $$$, and the warm spring weather to install everything. HURRY UP!!!
They say that global warming will cause terrible things to happen, like yesterday, when it was 72 degrees in January! My only real regret is that I have spent less time this winter in the garage than usual, and it has been unseasonably warm. I have not even fired up the garage heater once this winter. Global warming, I say bring it on!
I spent most of today cleaning parts for the vette, sorting bags of bolts and nuts, and preparing for the new powertrain. I ordered the trans this week, and will probably order the short block this week from Jegs...just waiting for that "check in the mail". I want to run down to Ace Service Center and throw a few dirty parts in the parts washer this week, and if the weather continues to stay warm, I'll even sand blast a bit.

 I know that I have not really been doing anything on the Vette since October, however I have been working very hard, saving up every penny for the new motor and 5 speed trans! I plan on purchasing both this winter, and installing them prior to the paint...otherwise I will never get it done! If I have to drive it in primer, well then so be it.
I did pick up sand paper and a flexible longboard to start block sanding, but I have not been around to do anything in a month. The good news is that I've been working hard and saving hard for parts. I also have been researching a bit, and I think I know why my paint was not flowing out.....not enough air pressure with my HVLP guns. I will have to practice on the hard top first.
Happy Thanksgiving!
 Today I shot a black guide coat over all the seperate body pieces. I had a little bit of black left over from the Honda Accord, enough to cover the hood, roof, doors and deck lid. I had to use a rattle can for the body, but the results are about the same. I started to sand the door jambs, and the rear valance...but it is getting dark and I am hungry...so that's it for tonight!